BitLocker (Windows)
If you are using a Pro, Enterprise or Ultimate edition of Windows, you can encrypt your USB sticks with BitLocker, a technology that allows you to encrypt the content of hard drives, flash drives and other storage units using the most advanced security standards of the moment.
BitLocker - it is good that you know - does not require formatting of the drives undergoing encryption but makes them usable only on PCs equipped with Windows Vista or later versions of the Microsoft operating system (regardless of their edition). Having made these necessary premises, we can take action.
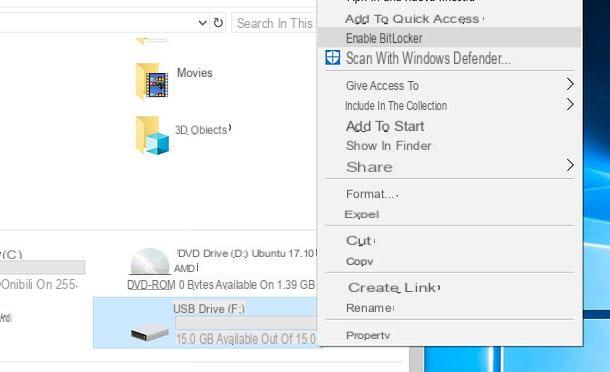
Then connect the USB key you intend to encrypt to your PC, open theFile Explorer (the yellow folder icon located at the bottom left, on the taskbar) and select the item PC / Computer question from the left sidebar. At this point, right-click on the icon of the key, select the voice Enable BitLocker from the menu that appears and wait a few seconds for the unit to be examined.
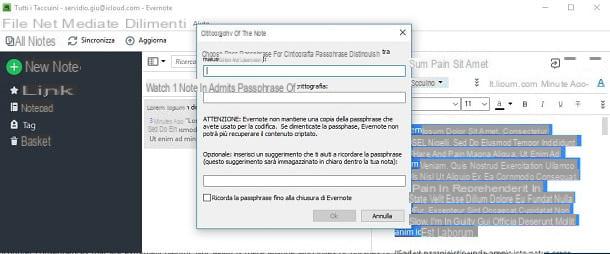
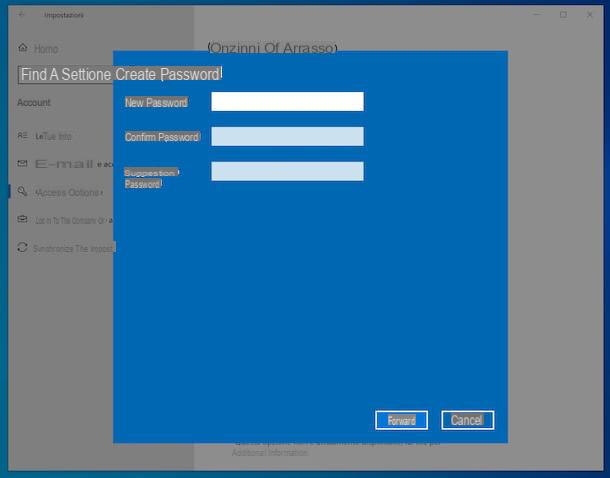
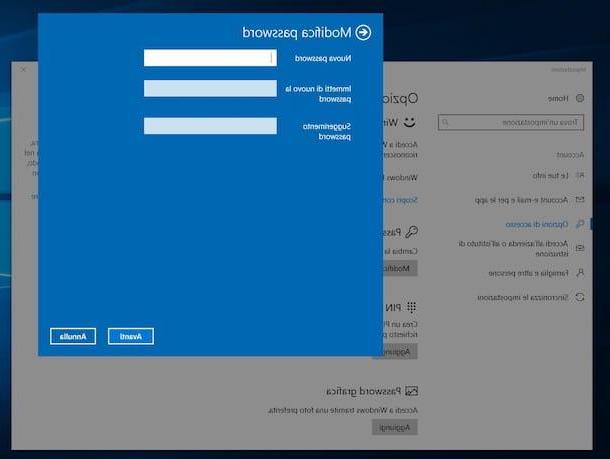
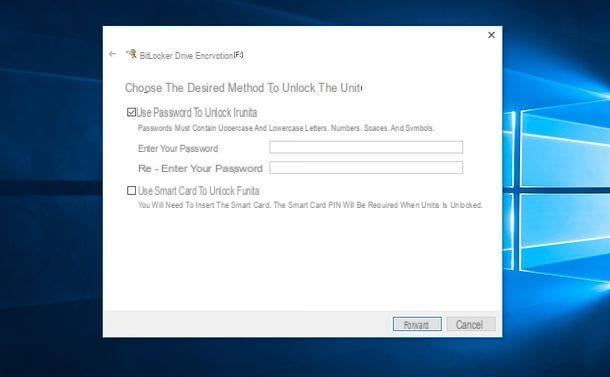
When the operation is complete, in the window that appears on the screen, put the check mark next to the item Use password to unlock the drive (so that a password is required to access the data on the pen drive), type in the fields Enter the password e Re-enter the password the password you intend to use to protect the key and click the button NEXT located at the bottom right.
At this point, choose whether to save the backup of the recovery key (the backup key that is used to unlock the BitLocker encrypted drive in case the password is lost) in your Microsoft account (therefore on the cloud), in a file (to be saved on the PC) or printing it, click again on NEXT and choose the encryption mode to apply to the pen drive.
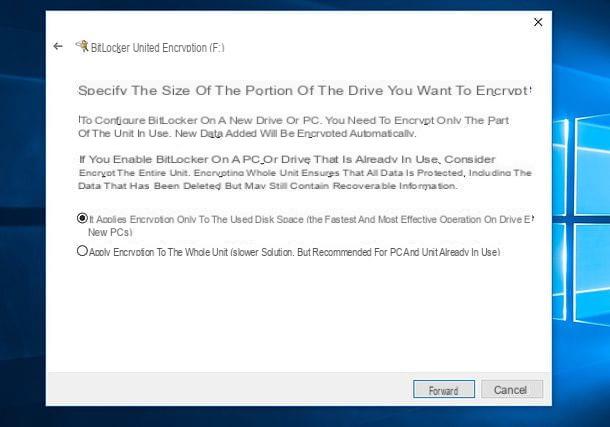
You can choose to apply encryption only to the space used by the disk, then only to the data currently on the key (quick operation), or to applies encryption to the entire drive, thus also encrypting the drive space which is empty but which may contain traces of the files previously deleted from the pen drive (slower operation). My advice is to opt for the second option, but if you are in a hurry and have never kept sensitive files for your privacy on the stick, you can also choose the option to encrypt "only the space used by the disk".
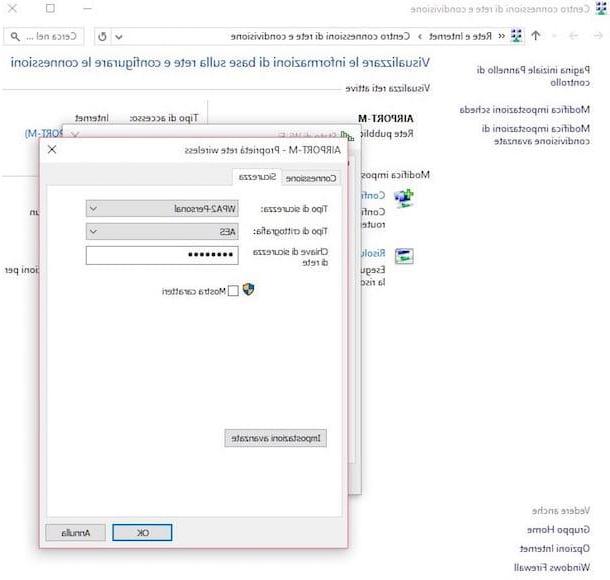
Now you have to choose whether to create a slightly less secure key compatible with all versions of Windows or a "super-secure" key (with XTS-AES encryption) compatible only with Windows 10 1511 and later versions: in the first case, put the sign of check next to the item Compatible mode. In the second, instead, put the check mark next to the item New encryption mode. I advise you to create a key in "compatible mode", which is still very safe and offers more flexibility than keys made with the "new encryption mode".
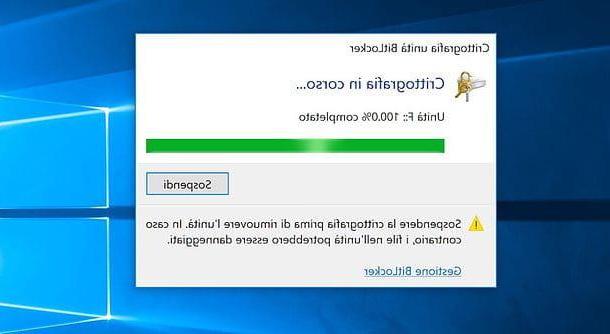
Then press the button NEXT, Then Start encryption and wait patiently for the encryption of the pen drive (or rather, of its content) to be completed. The operation could take up to several minutes.
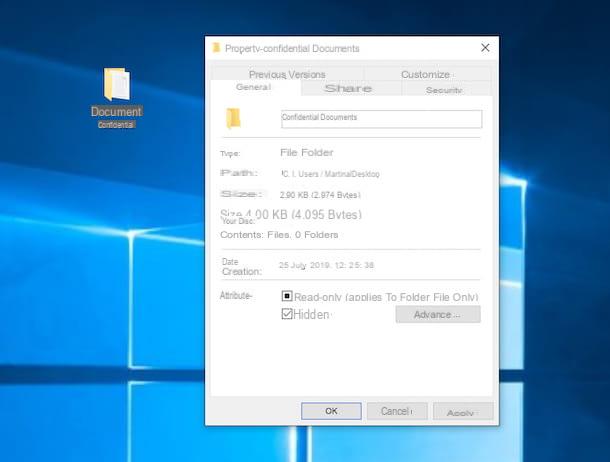
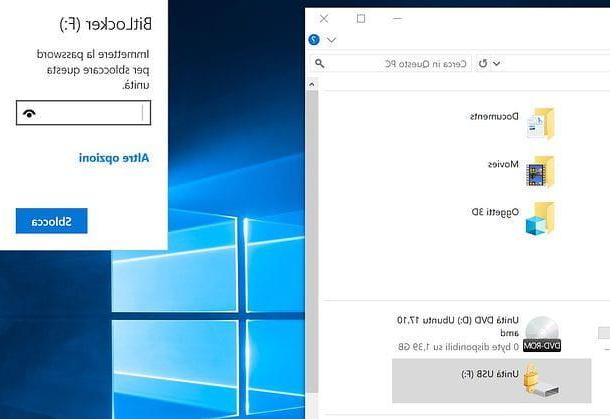
After activating BitLocker encryption on the key, to access the contents of the key, you will be asked to type a password: if you do not type the correct password you will not be able to access and modify the files on the drive.
If you have second thoughts, you can remove the BitLocker encryption by doing this: open theFile Explorer Windows, select the item PC / Computer question from the left sidebar, right click on the icon key e seleziona l'opzione Manage BitLocker give the menu answer.
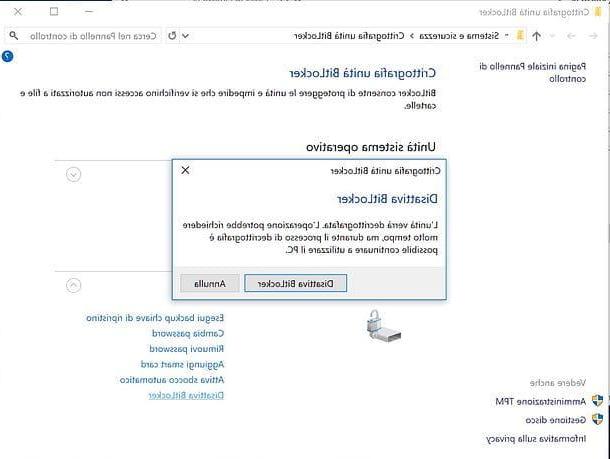
In the window that opens, click on the item BitLocker Desactivar which is at the bottom, answer BitLocker Desactivar to the warning that appears on the screen and wait patiently for the encryption removal procedure to be completed (it may take several minutes).
Once BitLocker encryption is disabled, you will be able to access the contents of the key (which will remain intact) and modify it without having to enter the password again. In addition, the key will also be compatible with versions of Windows that do not support BitLocker and with operating systems other than Windows (as long as it uses a file system compatible with the latter, eg FAT or exFAT).
Utility Disk (macOS)
If you have one Mac, you can use Disk Utility (macOS default utility for managing disks and partitions) to create a encrypted image file on your key and keep all the data you consider most important inside it.
An encrypted image file is like a normal dmg file (of those you download from the Internet and contain programs for macOS), but its contents can be changed freely and a password is required to open them. Interesting, right? Then take action now!
To create an encrypted image file on your USB stick, connect the pen drive to the Mac and choose whether to format it or not. If you want to format the drive, follow the instructions in my tutorial on how to format a USB stick with Mac (remembering that to create a stick that is also compatible with Windows you must use a file system between FAT: ed exFAT and a partition system MBR).
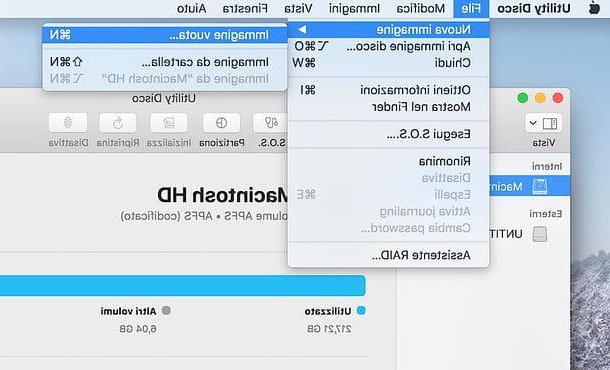
At this point, start Disk Utility (which you can find in the folder Other of Launchpad or search in Spotlight), go to the menu Fillet located at the top left and select the items New Image> Blank Image da quest'ultimo.
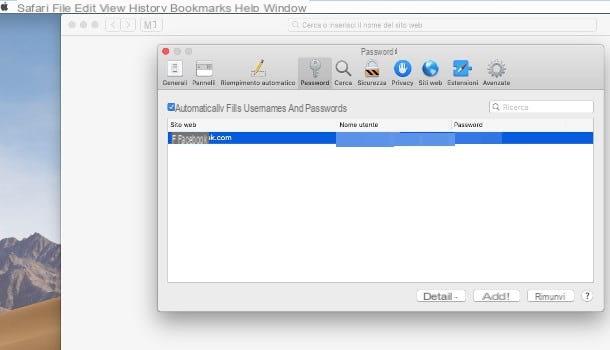
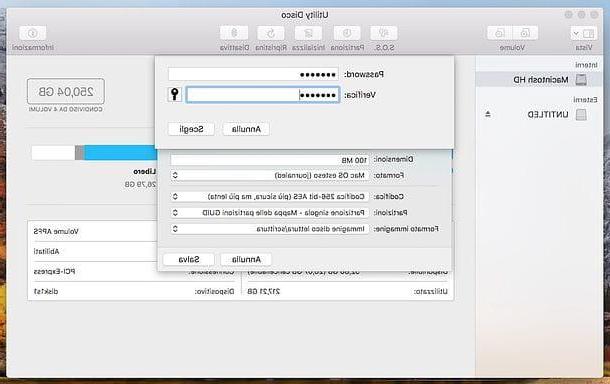
In the window that opens, make sure the option is selected Read / write disk image on the menu Image format, choose an encoding type from 128-bit AES encoding (recommended) e 256-bit AES encryption (more secure, but slower) and, in the window that opens, type the Password you want to use to protect the image file to be created on the stick (repeating it in the Verifica).
At this point, move into the field Sizes and choose the maximum size that the image file should have (i.e. the maximum size of the files it should contain overall), choose the file system you want to use from the drop-down menu Size (I suggest you use the same file system used for the stick, eg. Mac OS extended (journaled) if you intend to use the pen drive mainly on Mac or FAT / exFAT if you intend to use the drive on Windows PCs as well), select your USB stick from the menu located in and start the creation of your encrypted image file by pressing the button Save.
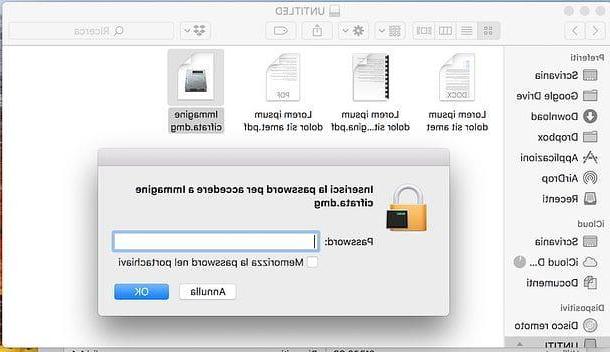
Mission accomplished! Now you have your image file in dmg format in which to insert the data you want to keep safely on your USB stick. To use it, log in to USB pendrive by double clicking on its icon on the macOS desktop, open the encrypted dmg file and enter the relevant password.
At this point, copy the files inside the image file as if it were a normal folder and, when finished, "unmount" the latter by right-clicking on its icon on the desktop and selecting the item Eject [image file name] from the menu that opens. Alternatively, you can take the image file icon from the desktop to the Trash or click on the? present in the sidebar of the Finder, next to the image file name.
Please note: only the files entered in the encrypted dmg file will be password protected, the files normally copied to the key (outside the image file) will not.
Another important thing to underline is that the encrypted image files, being in dmg format, are designed to be used mainly on Mac. However, there are programs (almost always for a fee) that allow you to use them also on Windows. To learn more, read my tutorial on how to open DMG files.
How to put the password on a USB stick