How to put the password to the Gallery on Android
If you have a smartphone with an operating system Android and you want to know how to put the password to the Gallery, read on: I'll show you, first, how you can set a code through some predefined functions of the operating system; then I will propose alternative solutions made by third parties.
Default function
With regard to predefined functions, some Android devices offer an application lock function with code, face recognition or fingerprint. I'll show you how to do it right away, taking for example a Huawei P40 smartphone with EMUI 10 (in any case, the steps to take are similar even on the devices of other brands).
To get started, tap on the icon Settings (Quella a forma di gear that you find on the Home screen or in the drawer), then press on the item Safety i went his Block App.
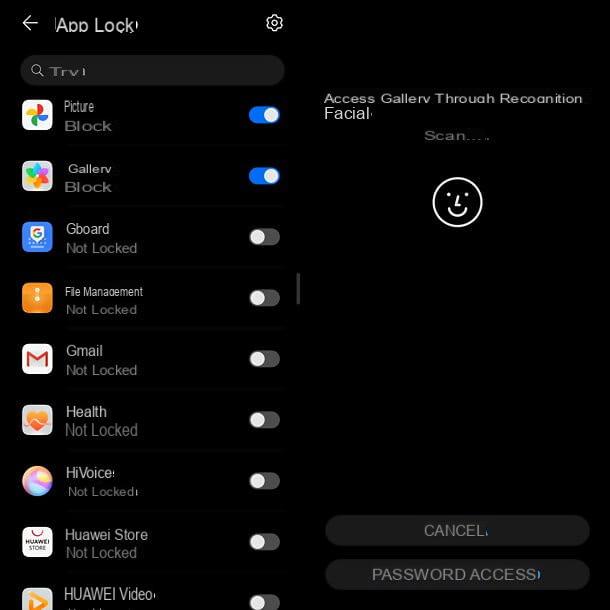
Therefore, log in via PIN or face / fingerprint recognition (if you have not set any of these unlocking methods, you can do it at the moment). Once you have accessed the Block App, you will find yourself in front of the list of applications installed on your smartphone.
Scroll, therefore, until you find the application of Gallery and move up ON the relative lever. In this way you will have protected access to the Gallery app with a PIN or biometric unlocking system, and you can do the same with all the other apps (eg. Google Photos).
Please note that the block imposed in this way to the apps is canceled after the first successful unlock: in fact, until you turn off the smartphone screen, the app will be unlocked. To request unlocking the app again via PIN or face / fingerprint, you will need to turn off the phone screen.
In case of second thoughts, if you want to remove the block from the Gallery app, go back to Settings> Security> App lock, log in and move up OFF the lever relating to the Gallery (or in any case to the apps you want to unlock).
Norton App Lock
As mentioned, not all Android devices offer the option of Block App: if yours does not have one, you can resort to the use of third-party applications that allow you to block access to other apps with a personalized PIN.
I recommend, since these are applications that need advanced privacy permissions in order to work, download them only from trusted sources (the Play Store) and only downloads solutions that are produced by software houses of proven reliability and with positive comments from users.
Among the apps of this type, there is Norton App Lock, produced by the famous software house dedicated to the development of the homonymous antivirus. It's free and allows you to lock any app with a personal unlock pattern or four-digit password. You can download it from the Play Store by connecting to the link I just provided you directly from your device (or by manually searching for it in the store) and pressing the relevant button Install.
Once the download is complete, open the app and follow the instructions on the screen, to allow it all the permissions it needs to work properly. Remember that the initial setup process may vary slightly from device to device, but don't worry - the process will be driven by the application and, once inside, there will be no noticeable differences.
In any case, what you will have to do is press on Accept the terms of use and then the button Ok at the notice of Grant the app permission to display in the foreground. After that, select the button Grant permission, then go back to the app.
Now tap the button Configuration, as indicated by the screen, then press the button Installed Services within the page Accessibilità. Finally, select the Norton App Lock Service and activate it by pressing Ok on the notice received. Once the configuration part is finished, go back to the application again.
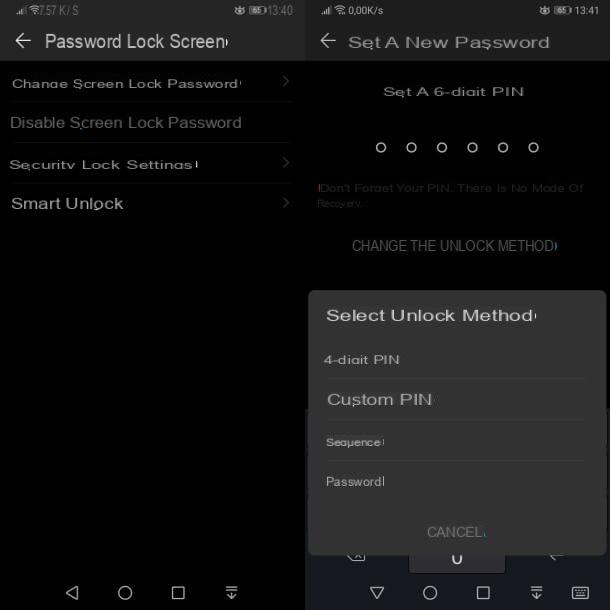
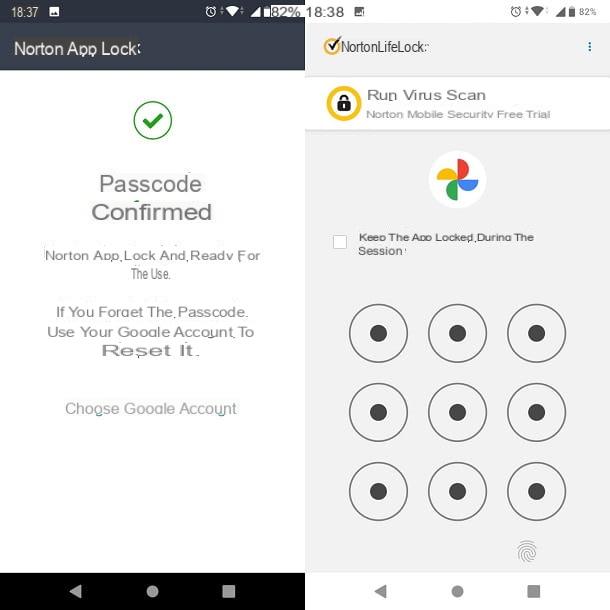
Once the initial setup process is finished, you can draw an unlock pattern, or by pressing the button at the top right Switch to Passcode, enter a four-digit numeric code (recommended). Then select the option you prefer and confirm it on the next page. After that, choose a Google account among those on the device to retrieve the code in case of loss and press the button Continue.
Well: you have finally entered the Norton App Lock main screen, where you can decide which applications to block. You'll notice Norton App Lock recommended apps to lock, including Gallery: then tap on gray padlock open which is next to the Gallery icon, until it turns green and closed.
You can now exit the application and tap on the Gallery, to check that the set code is active. If you want to change your PIN, or want to remove the lock from the Gallery app, go back to Norton App Lock, enter your unlock code or pattern and press the green padlock, activated the precedence.
In case you want to uninstall the app, you will have to re-enter the lock code set for it, after which the applications you blocked using it will also be automatically unlocked.
How to put the password to the Gallery on the iPhone
- iPhone have an operating system (iOS) more "closed" than that of Android, so there are no third-party apps that allow you to block access to other apps with a PIN; however there are predefined functions that allow you to obtain a similar result and external apps that allow you to create a PIN protected safe, inside them, in which to keep photos. For all the details, read on.
Default function
Apple smartphones offer the ability to set an unlock code for applications after they are used for a certain period of time. This feature is present on the screen Usage time, which allows iPhone owners to monitor how many minutes each individual application on their phone has been open throughout the day or week. Let's see, therefore, how to use this function to put the password to the Gallery.
It is good to clarify immediately that this is not an irreversible process and that it requires the use of the Gallery application for at least one minute a day: the code blocking of an app, in fact, occurs only after the maximum usage time established in the “Usage time” menu (which is minimum 1 minute). If you do not use the app for this time before, the PIN lock will not take place.
That said, access the screen Usage time going to the menu Settings of your iPhone (theicona dell'ingranaggio located on the Home screen) and scrolling down. The option is marked with an hourglass icon. Once you reach the screen of your interest, if you have never activated the function, you will have to press the button Enable "Usage Time".
You will be explained the features of the function, which is used to receive weekly (or daily) reports with information about the time you spend in front of the screen. The option you will need will be the one named Pause of use and limitations on the use of apps, which I'll tell you about shortly. In the meantime, press the button Continue, and answer the question that will be asked on the next screen. You will be asked if the iPhone is yours or is intended for use by a minor, to get some additional information on usage times. Choose the option you prefer to access the main screen.
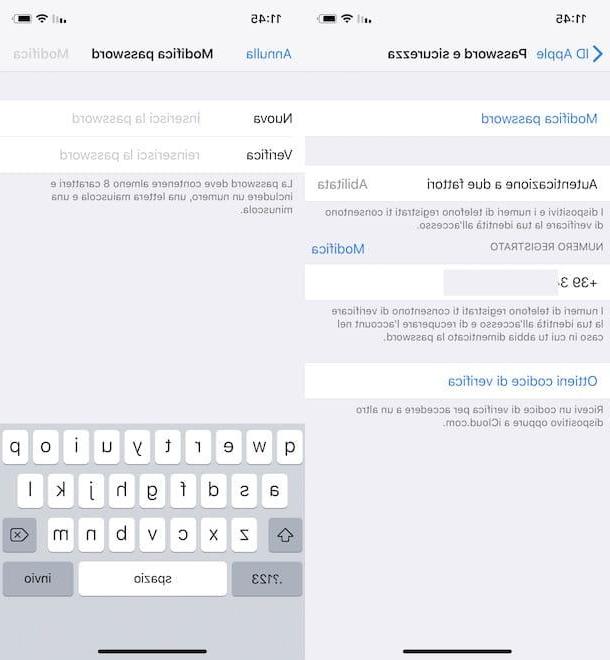
At this point, to set an unlock code, scroll down until you find the option Utilizza codice "Tempo di utilizzo". This function will be used to activate a password at the end of the daily use period of the applications to be blocked (in your case Photos, that is the Gallery), in order to keep it locked from the use of other users. Tap the button and set a four-digit code. Confirm it and then log in with your Apple ID, to recover it in case you forget it.
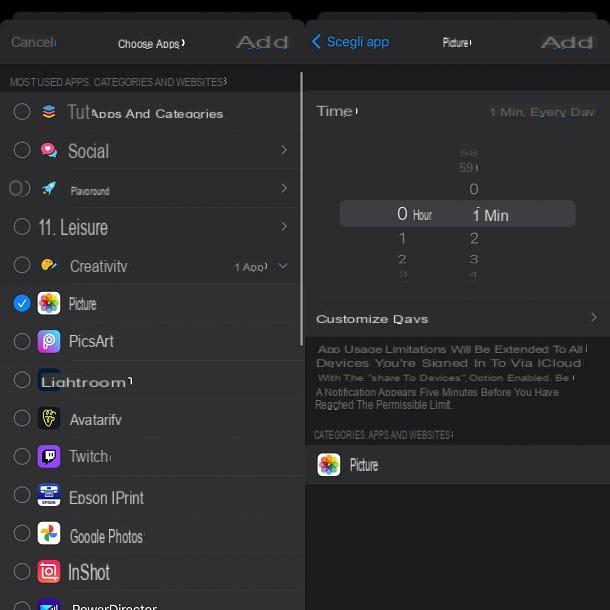
To set a limitation on the use of applications (in your case Photos), tap the button App limitations and, subsequently, su Aggiungi LIMITATION OF USE. Within the proposed new screen, choose the application for which to set a block at the end of a certain period of use.
To find the Photos app, tap on the menu Creativeness, and select the application named Gallery, then press the button NEXT located at the top right. You will be presented with a screen that allows you to choose a usage timer for Gallery: Choose 1 minute to every day of the week and press pulsating Add (in alto to destra).
By doing this, you will have enabled the Photos app lock after 1 minute of daily use, but that's not all. Once this is done, open the application Gallery and keep it open for 1 minute, to lock it the first time with the password just chosen. Remember to repeat this procedure every day, as the daily use timer is reset at midnight (also, from time to time during the day, access may be allowed for another minute).
Once the app is blocked, to request access to it, start it and press the button Enter the code for "Usage time", known only by you. In case you want to enter the Photos app, you can choose whether to approve access for 15 minutes, an hour o all day, at the end of which the code will be entered again. You just protected, albeit temporarily, your photos from prying eyes.
If you change your mind, you can go back to the menu Usage time and disable the feature altogether or simply remove the app Gallery from the list of blocked apps.
Private Photo Vault
In case you intend to use a password for your photos on iPhone, regardless of their presence in the default Photo gallery, I recommend using an application on the App Store, called Private Photo Vault.
This is an application that allows you to import photos from the Gallery and protect them with a four-digit unlock code. The application is free to use, but there is a paid version that costs 5,49 €, which allows you to create unlimited albums, delete advertisements, enable wireless and SMS photo transfer, and full video support. You can consider buying it if you will find yourself particularly comfortable with the free one.
To download Private Photo Vault, visit the link I gave you earlier directly from your iPhone (or manually search for the application in App Store), press the button Get and, if requested, verify your identity via Face ID, touch ID o password dell'ID Apple.
As soon as it is opened, the application is presented illustrating its functions: after having tapped the button Start, you will be given the opportunity to enter yours personal password of four digits. Once the password has been set, you can choose whether to enter a backup email address (to recover the code, in case you forget it). If you want to do this, press the button Creation in the warning that appeared on the screen, otherwise press the key Cancel.
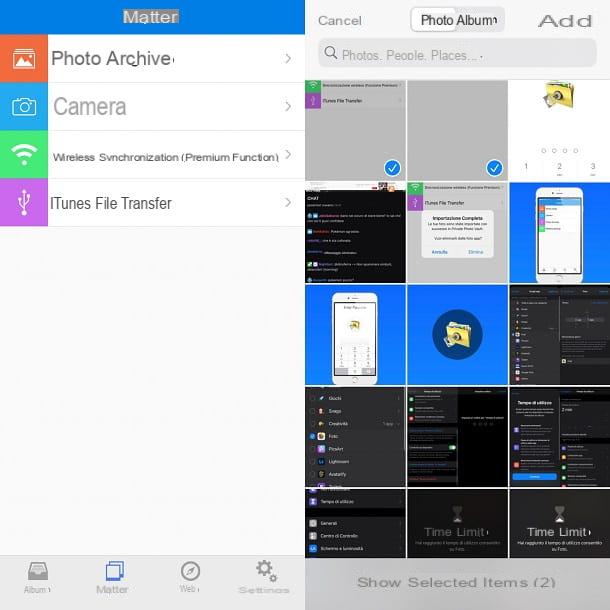
Once this is done, tap the button twice NEXT e You agree the terms and conditions of use of the application. Once logged in for the first time, you will be able to import the photos into the menu Import located at the bottom. Once you reach the import screen, in the free version, you can choose whether to import the images from thePhoto-archive or directly by clicking from the Camera. The paid function also offers the Wireless Synchronization.
You will be offered the opportunity to enable synchronization with Albums on iTunes, by tapping on the relative option and pressing the button that appears in the center of the page. For now, however, I'll show you how to import photos from the Gallery: then tap the button Photo-archive, by your complaint Main Album and individually select the photos you intend to import by swiping them with your finger.
You can check the photos you are importing via the feature Show selected items, placed at the bottom, with which you have the opportunity to deselect those you do not want to import. You can also view all the albums on your iPhone by selecting the option Album in the selection tool at the top and center.
Once you have chosen the photos to be password protected, tap the button Add, located at the top right. Then press Delete if you are going to move to the album Recently deleted Photos application the images you imported, but be careful, if you uninstall the Private Photo Vault application before restoring photos to iPhone, you risk losing all imported images! Conversely, if you want to make the photos in question completely disappear from the Photos app and your iCloud Library, remember to delete the photos from the Recently Deleted album as well.
In any case, if you want to delete them, allow access to all the photos, by tapping the indicated button, that is Allow Access to All Photos, so on that Allow access to all photos. Finally, press the key Delete in the notice received. In this way, the photos you intend to password protect will be saved within the application, in the folder Main Album. With the key capacitor positive (+) lead located at the top right, you can also create other albums with custom names, in which to put your photos.
Once the Private Photo Vault configuration is complete, each time the application is opened, you will be asked for the four-digit personal code previously entered. In case you want to change it, tap the button Settings, which has the icon in the shape of gears, located at the bottom right, and then go to the item Passcode settings. You can change the passcode and, in addition, you can enable unlocking with Face ID, if your iPhone allows it. To do this, tap the button Face ID, and then on that Ok to confirm.
To bring the images back to the iPhone Photos application, enter the album you are interested in and press the button Modification (top right). Then press the button Tutto, to select all the photos, or select them individually by swiping them with your finger.
So, press the button Export and then that Camera Roll. This way you can restore your photos in the main iPhone Gallery. Remember to do this in case you intend to uninstall Private Photo Vault.
How to put the password to the Gallery